
Our meeting on Wednesday 3rd July 2024 was organized by Barry Cumming, Barry wanted to use this meeting to experiment with square or odd shaped bowls as he had not done any of these since he started woodturning. He then organized for 4 more turners to man all our lathes to demonstrate the methods used to make square or odd shaped bowls.
As Barry had not made a square bowl so far in his woodturning, I suggested I mentor Barry through the making of a square bowl at this meeting, he was pleased to have that assistance. I kept the design very simple for his first real effort although he had been experimenting at home with making square bowls, I mention him making bowls (plural) as I understand he had tried several with varying degrees of success one of which he brought in to let us see.
On the night there were 5 turners but that did include me working with Barry so only 4 lathes were in operation. There were 3 lathes working on square bowls that started and finished in the square, one lathe had a different approach, David Hobson was to turn a triangular bowl but using a glue and paper joint system to make his bowl.
As I was to be working with Barry, Alan Smith took all the pictures, here are those pictures along with a little text.
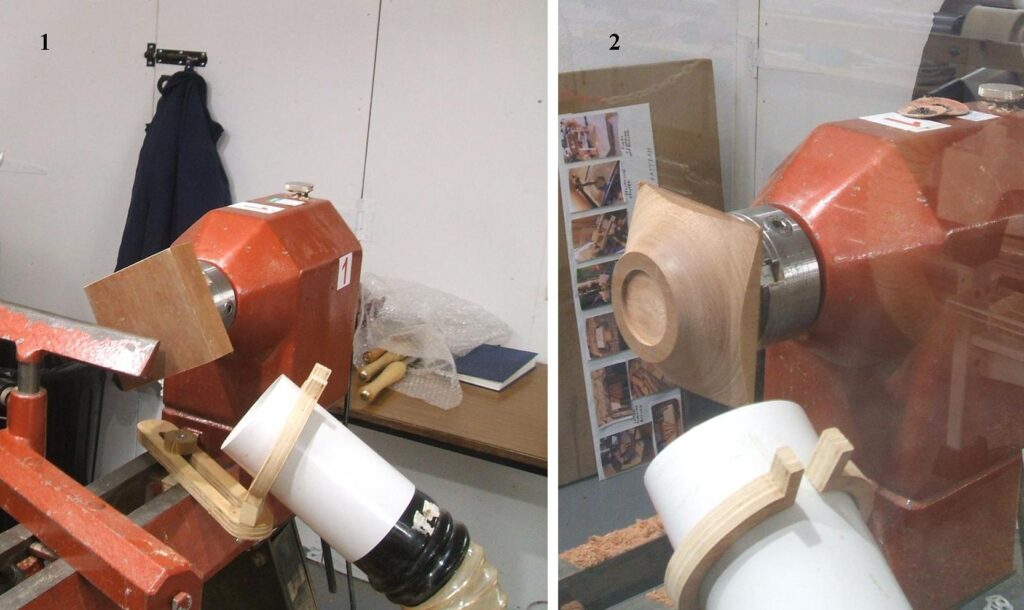
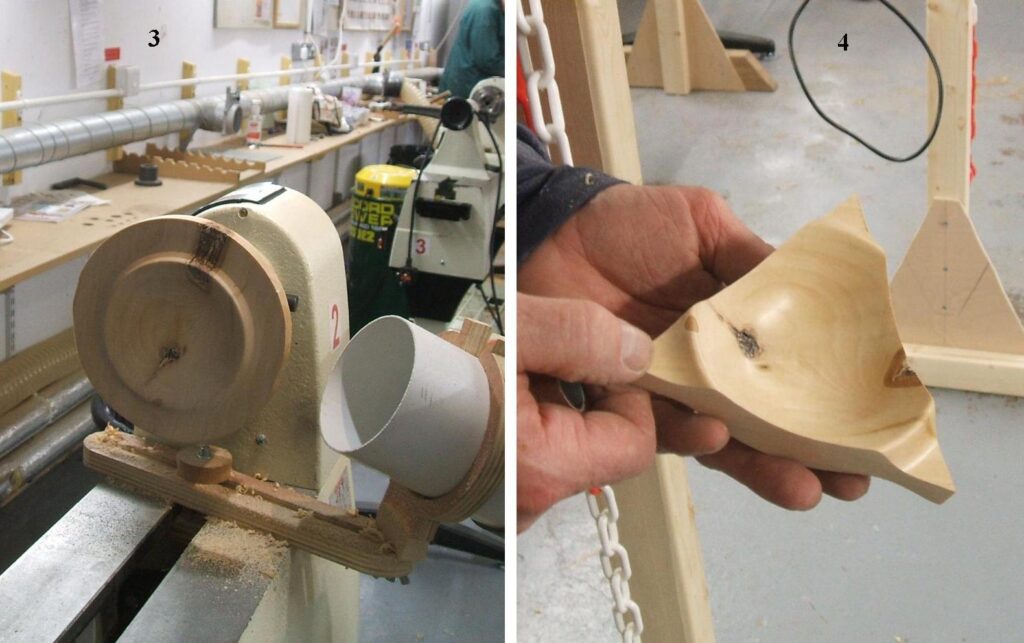
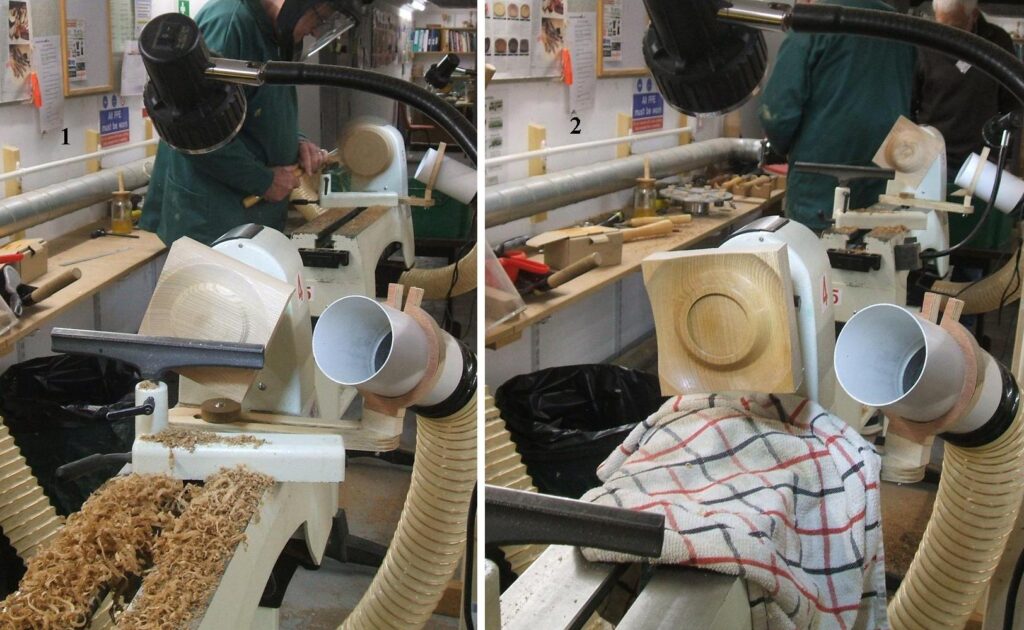
On lathe 1 were Barry Cumming and me as mentor. Picture 1 shows the Mahogany blank that we were to turn into a square bowl mounted on the lathe. A word of caution here, it’s very important to get the blank mounted as near to absolute centre as possible, if it’s off centre by any degree it will show up further down the line. Picture 2, the base has been turned including the chuck recess, it was then sanded, sealed and polished before turning it around.
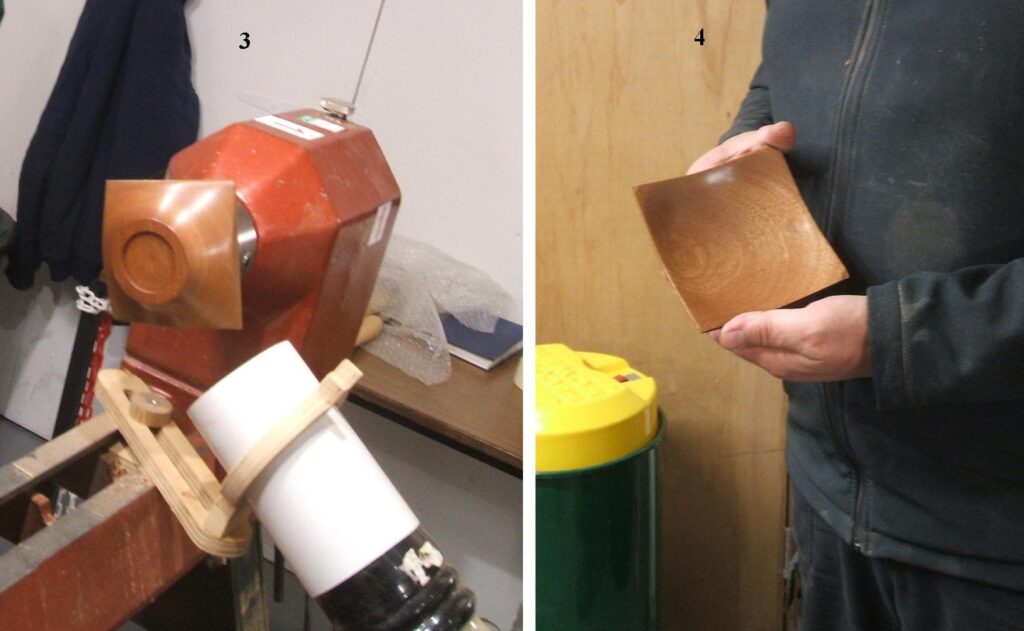
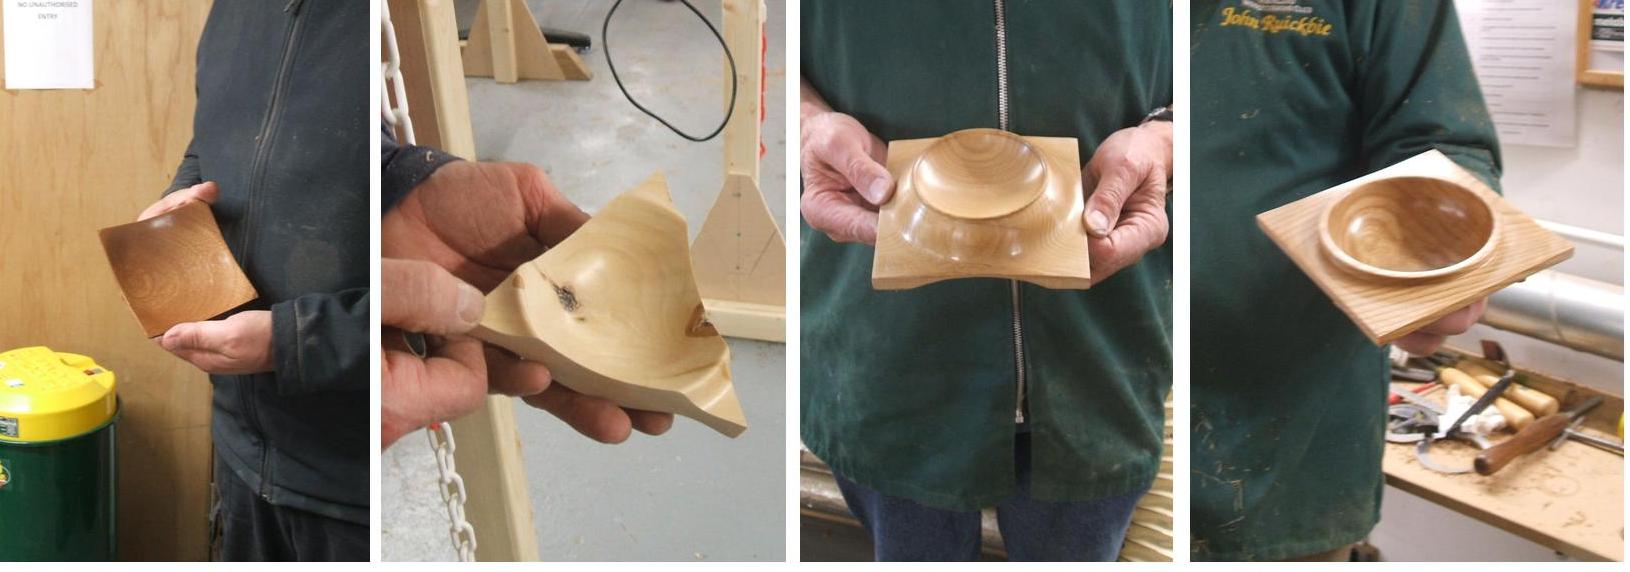
In picture 3, the base was now complete having been sanded, sealed and polished, one coat of sanding sealer was applied then flattened with some fine wire wool and a coat of Black Bison dark polis was applied, the polish should be rubbed well in then allowed to dry before buffing up with a soft cloth. Picture 4, the top side was turned to a nice flowing shape and making sure the side profiles were all of an even thickness, if this is not followed the difference in thickness will show up and spoil the effect.
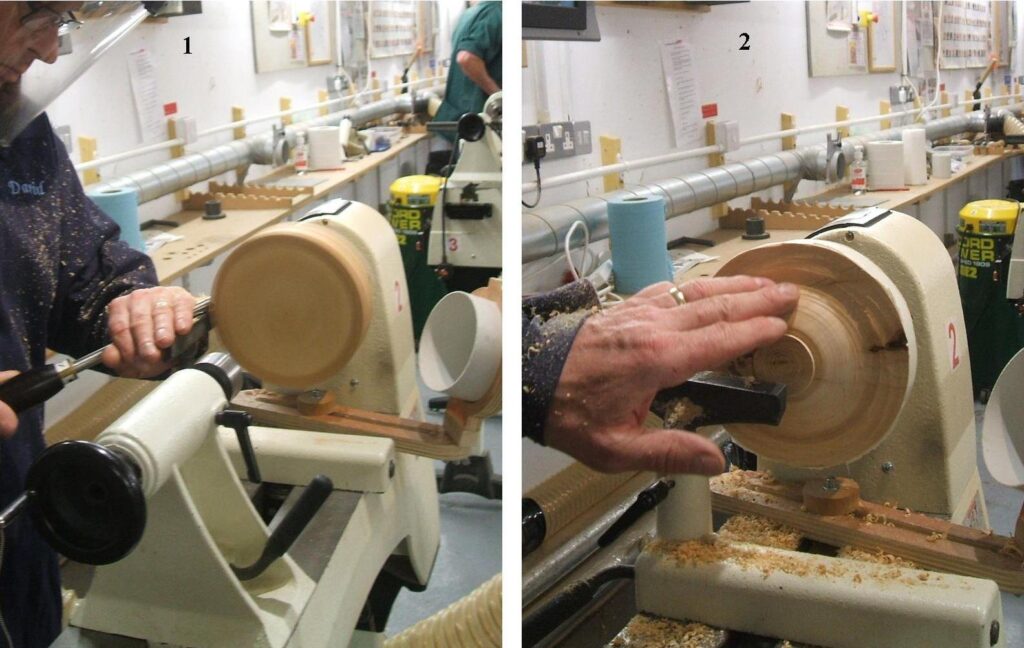
On Lathe 2 was David Hobson, David was to make a triangular bowl. Picture 1 shows David making a start on the outside of his bowl, you will note that it’s not triangular at this stage, the reason for that is that David cut the blank to a triangular shape before he started to work the bowl, he then used a paper glue joint to glue the cut off pieces back on, this allows him to turn the bowl as if it were a complete disc and not a triangular shape making it much easier to do. Picture 2 shows David checking the glue joints are holding firm, in this picture it appears as if it’s just a round blank.
Picture 3, the work piece has been completed on the outside, here the finishing process is happening to the top side or inside, the glued on parts now need to be removed, that happens with a gentle tap on the parts out with the triangular shape, they should fall away leaving a residue of paper and glue that needs to be sanded off. Picture 4, here is David’s finished bowl.
No one was on lathe 3, Dave Line was on lathe 4, here he is working on his square bowl, this is the underside being worked done the traditional way by leaving the blank in the square. Picture 1 shows the base nearing completion, still requiring the chuck recess to be worked before the finishing process. Picture 2 shows the base now with the chuck recess and the finish complete ready to turn it around to work the inside.

Picture 3, the top side almost complete, here Dave is positioning the tool rest for his final cuts, it would then be sanded, sealed and polished. Picture 4, here is Dave with his finished square bowl.
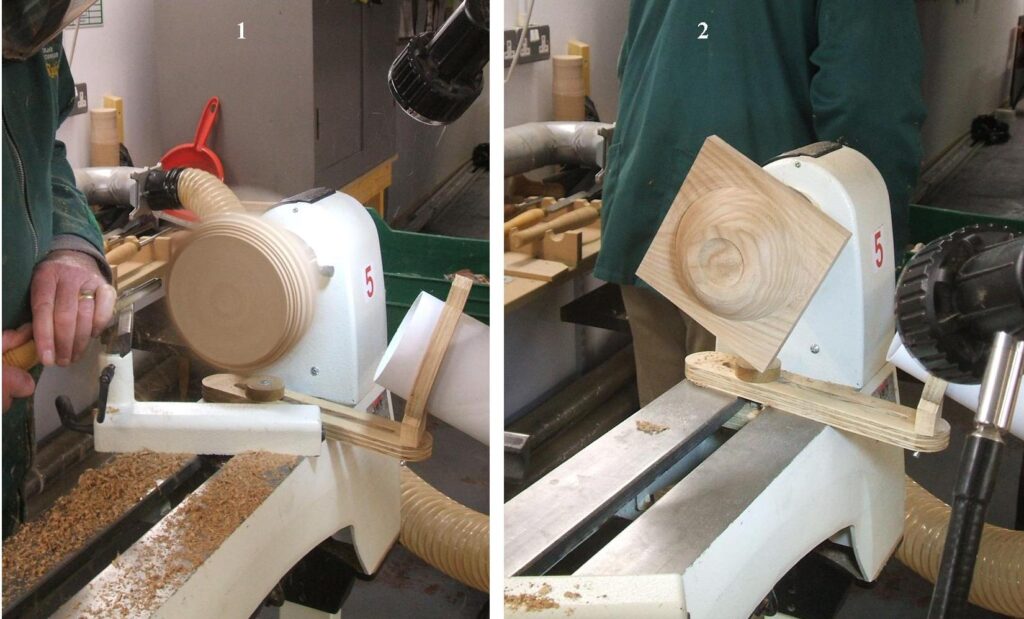
On Lathe 5 was John Ruickbie he too was making his square bowl using traditional methods, i.e. left in the square. Picture 1 shows John making a start on his bowl. If you look very carefully near the top of the blank as it’s spinning you will see the faint traces of the square section showing up as just a ghost, bear in mind that is all the turner sees also. Picture 2, the base almost complete, some sanding still required.
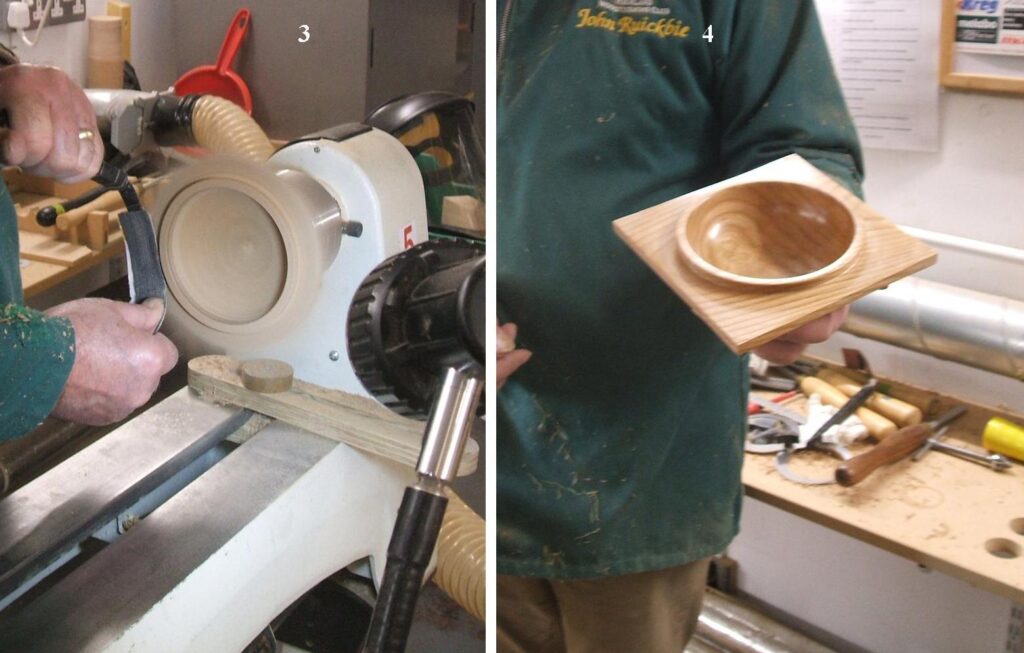
Picture 3, the top side turning has been completed, here John is using his own method to assist with the sanding process, great care needs to applied to the sanding when the square edges are spinning round at speed, this picture too shows the ghostly appearance, this is all the turner sees also. Picture 4, here is John with his finished bowl.
That completes the square bowls programme, we hope you were able to follow what you saw and that these few pictures can remind you of the process involved in the making of square bowls.
Thank to all those who took part and thanks to you for attending the meeting. Our next meeting is on the 18th July, it’s another of our showtime meetings being handled by Nick Simpson, do bring along some of your turning for us to see and hear about, remember you can take more than one item along to be shown.