
Our meeting on Thursday evening 22nd August 2024 was organized by Alec Mutch, this was a solo demonstration by myself on the theme of Off Centre or Multi Centre turning. As some of the equipment required to do this type of turning was not something that all turners would have as part of their kit I decided to do this demonstration on my own.
There are a few ways of getting an off centre look without actually needing to purchase any new pieces of kit, one of which I demonstrated here, all that’s required is your 4 jaw chuck and a revolving centre, it’s all to do with the mounting points on the piece of turning you are about to do.
I started the demonstration by explaining how and why the mounting points are to be used, I also explained that the chuck end needed to be kept square and mounted on the lathe using the gaps between the jaws to hold the work piece, all the interesting parts were to happen at the tailstock end.
Here are a few pictures and text to help you follow what I did at the meeting.

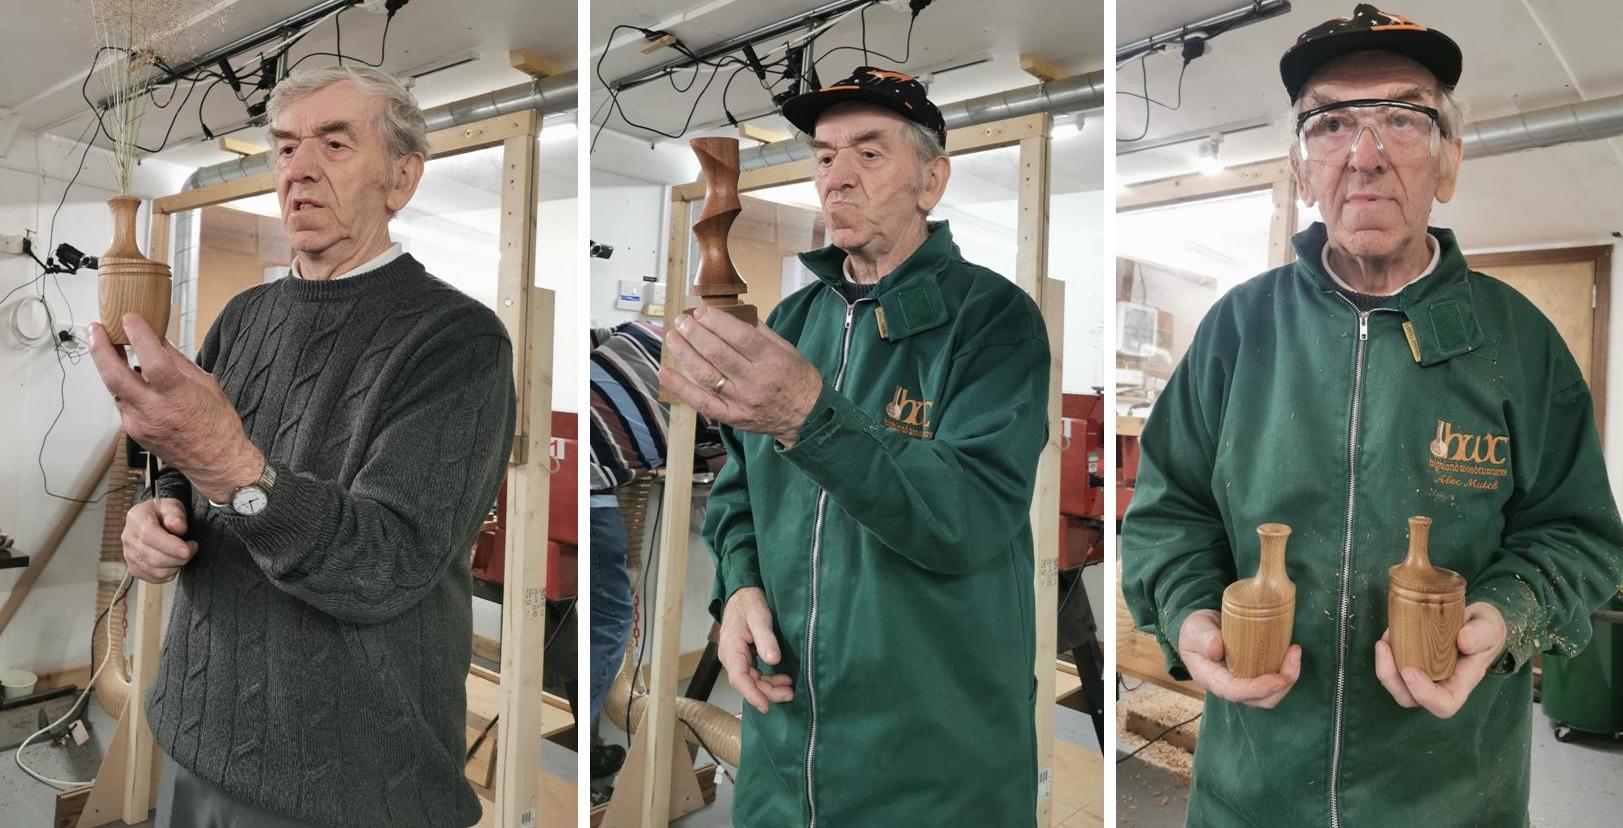
Picture 1, here I can be seen showing the members a piece of off centre turning that required no additional kit other than your 4 jaw chuck and a revolving tail centre. Picture 2, I have mounted the blank in the chuck, it’s still in it’s square form at this stage and I have brought the tailstock up and placed it in the centre of the blank.
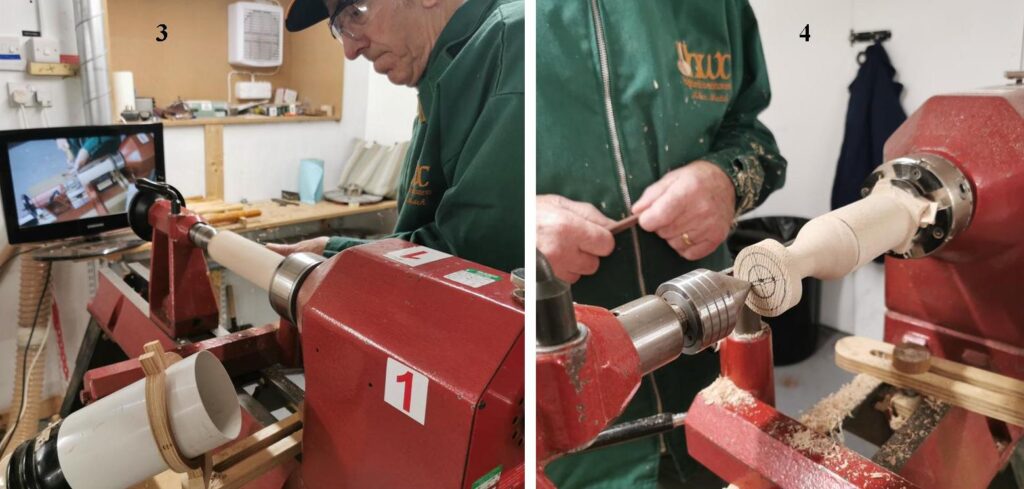
Picture 3, Here I can be seen turning the blank to the round, I did leave a short piece in the square where it was mounted in the jaws of the chuck. Picture 4, You will see at the tailstock end there are 2 pencil rings marked out, you will also see that there are 3 centres showing, an absolute centre and 2 off centre marks, to achieve the off centre look we have here the tailstock had to be placed in one of the off centre marks, this is achieved by loosing the chuck, moving the blank to one of the off centres and re-tightening the chuck.
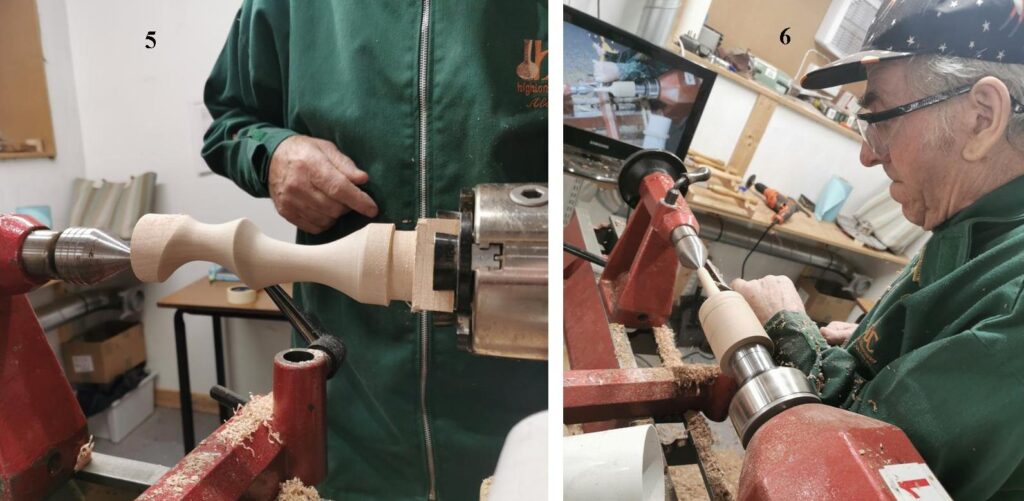
Picture 5, I moved the tailstock centre to the remaining off centre and turned the 2nd part, here you can also see I have created a spigot, that was done using the middle centre, care needs to be taken to achieve the sharp change over in the middle of the turning, a pencil line helps to show where the turning needs to start from, the ghosting effect makes for some interesting turning, you may need to stop/start often just to know where you are at. Picture 6, I have moved on to the 2nd way to achieve an off centre look, this time a piece of kit is required, this is in the shape of a Wobble Chuck, a simple piece of kit not expensive but very useful, Here I’m showing how the little chuck works.
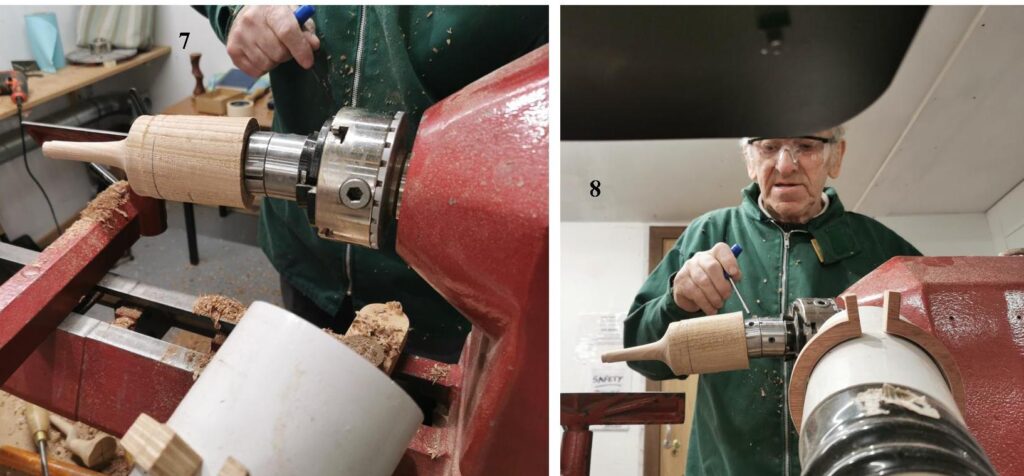
Picture 7, shows the Wobble chuck held in the jaws of the chuck, here I am loosening the moving part of the chuck to form the desired shape. Picture 8, with the workpiece now where I want it I tightened up the Wobble chuck before proceeding to make the next cuts.
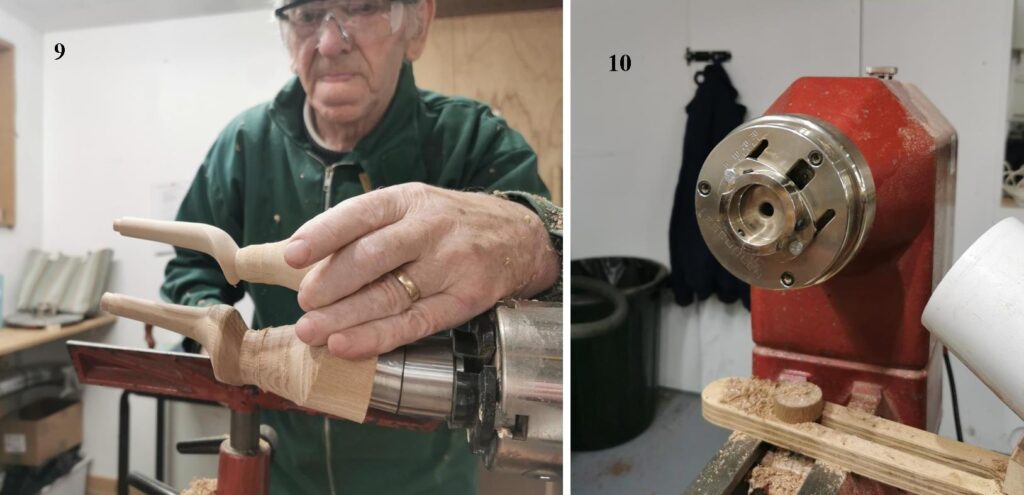
Picture 9, I brought an example I made earlier to show where we were heading for, here I can be seen comparing the 2 in order to know how much more I needed to cut off, I didn’t take this any further as I wanted to show the last piece of kit I brought along. Picture 10, this is an Eccentric Chuck made by Vicmarc, not cheap but very versatile, come with lots of additional parts. After explaining some of it’s features I went on to make use of it’s sliding features, the centre can be moved by as much as 30mm.
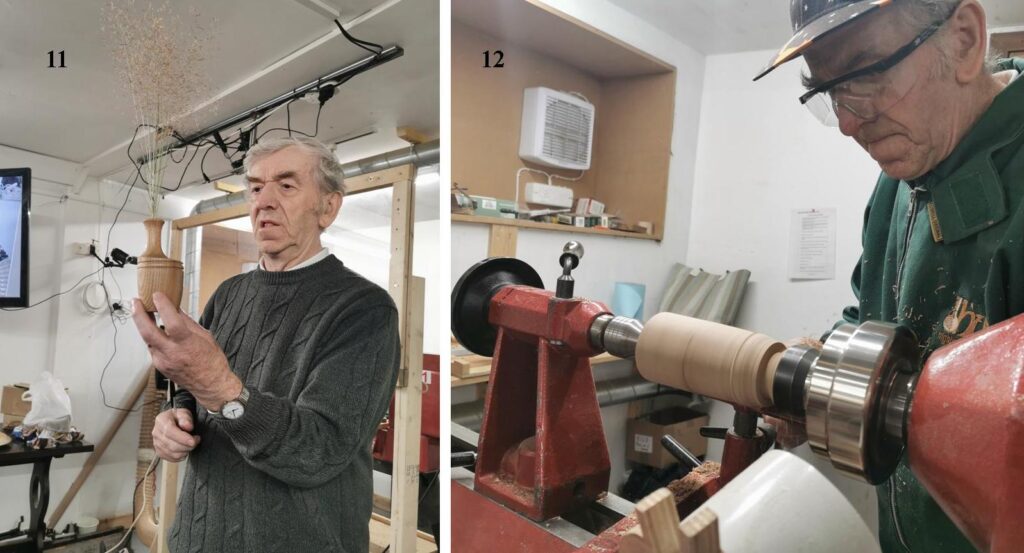
Picture 11, I showed the members an example of a vase I made using this chuck where the top half was off set by only 12mm. Picture 12, the work piece mounted in the chuck, the first stage was to turn it into the round, you will see that at the chuck end I have made a slightly deeper cut, this will be where it gets parted off at the end.
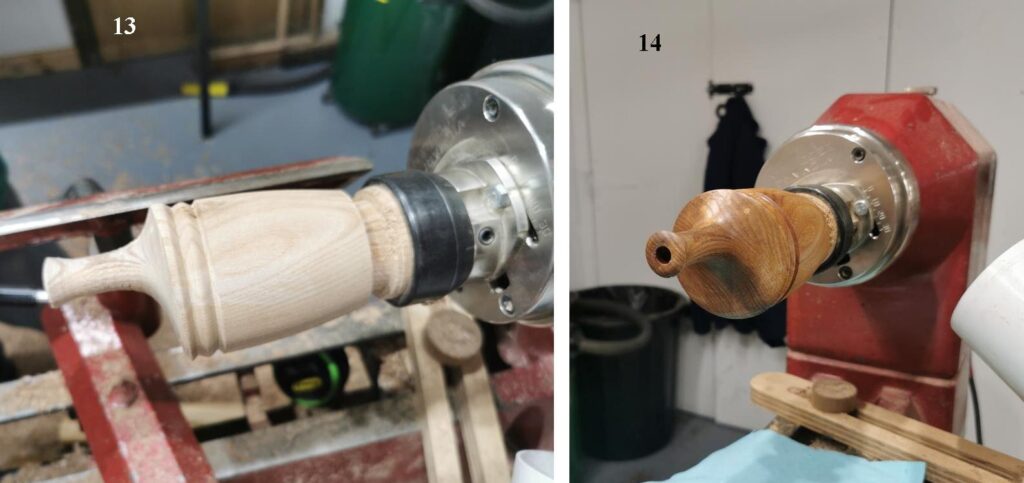
Picture 13, I moved the assembly 12mm to one side, tightened up the chuck, engaged the tail centre before cutting away the eccentric shape to reveal the off set I was looking for, it can look quite scary when you move the centre so take it easy, lots of light cuts at least until you reach the round again. Picture 14, I applied a coat of sanding sealer to the vase, then using a very fine sanding medium I flattened all the raised grain before applying a coat of Black Bison Wax Polish.
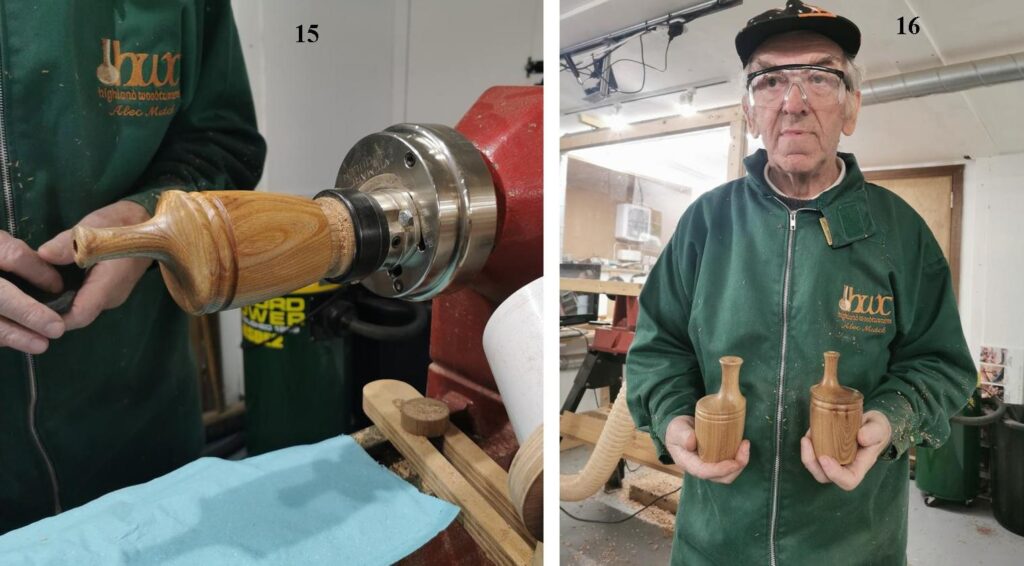
Picture 15, the off set vase now polished and ready to be parted off, a little bit of base sanding would be required and a coat of sealer applied. Picture 16, Her I can be seen holding both off centred vase’s
That completed my demonstration on off centred or multi centred work, do have go at making something using the off centred method, especially the first system, it requires no additional kit but does give you a whole new look to your turnings, I also creates a talking point as most people will not have seen too many items made this way.
Pictures were courtesy of Susan Drew, thank you Susan for the quality of the pictures.
Our next meeting is on the 5th September 2024 and is being managed by Barry Cumming, Barry has arrange for all 5 lathes to be used and the theme for this meeting is making items with captive rings, another very interesting programme.